
Get Started with Server Monitoring
Step 1: Installing Server Monitoring on your computer
Installing Server Monitoring is an easy process.
Simply download the installer (Setup-RDS-ServerMonitoring.exe) from our web site, and follow the steps detailed here.
Files are decompressed and copied into the following folders:
- "C:\Program Files\RDS-ServerMonitoring" (32 bit systems)
- "C:\Program Files\ServerMonitoringAgent" (32 bit systems)
- "C:\Program Files (x86)\RDS-ServerMonitoring" (64 bit systems)
- "C:\Program Files (x86)\ServerMonitoringAgent" (64 bit systems).
The free trial is fully featured with a 15-day license.
After installation, there will be a new shortcut on your Desktop:
Step 2: Checking your Installation
The installation of Server Monitoring comes in 2 parts :
- The Server Monitoring Administration Console - The main Server Monitoring interface, where an admin can view information and create reports on server health and activity.
- The Server Monitoring Agent - A small program installed on each monitored server. The Agent collects critical data and sends it to the Server Monitoring Administration Console.
When the Server Monitoring Administration Console is installed, the Agent is as well. This means that when you open Server Monitoring for the first time, you will immediately see the local machine listed as a Monitored Server on the home screen.
To open the Administration Console, click on the Server Monitoring desktop shortcut. You will be greeted by a home screen that looks like this:
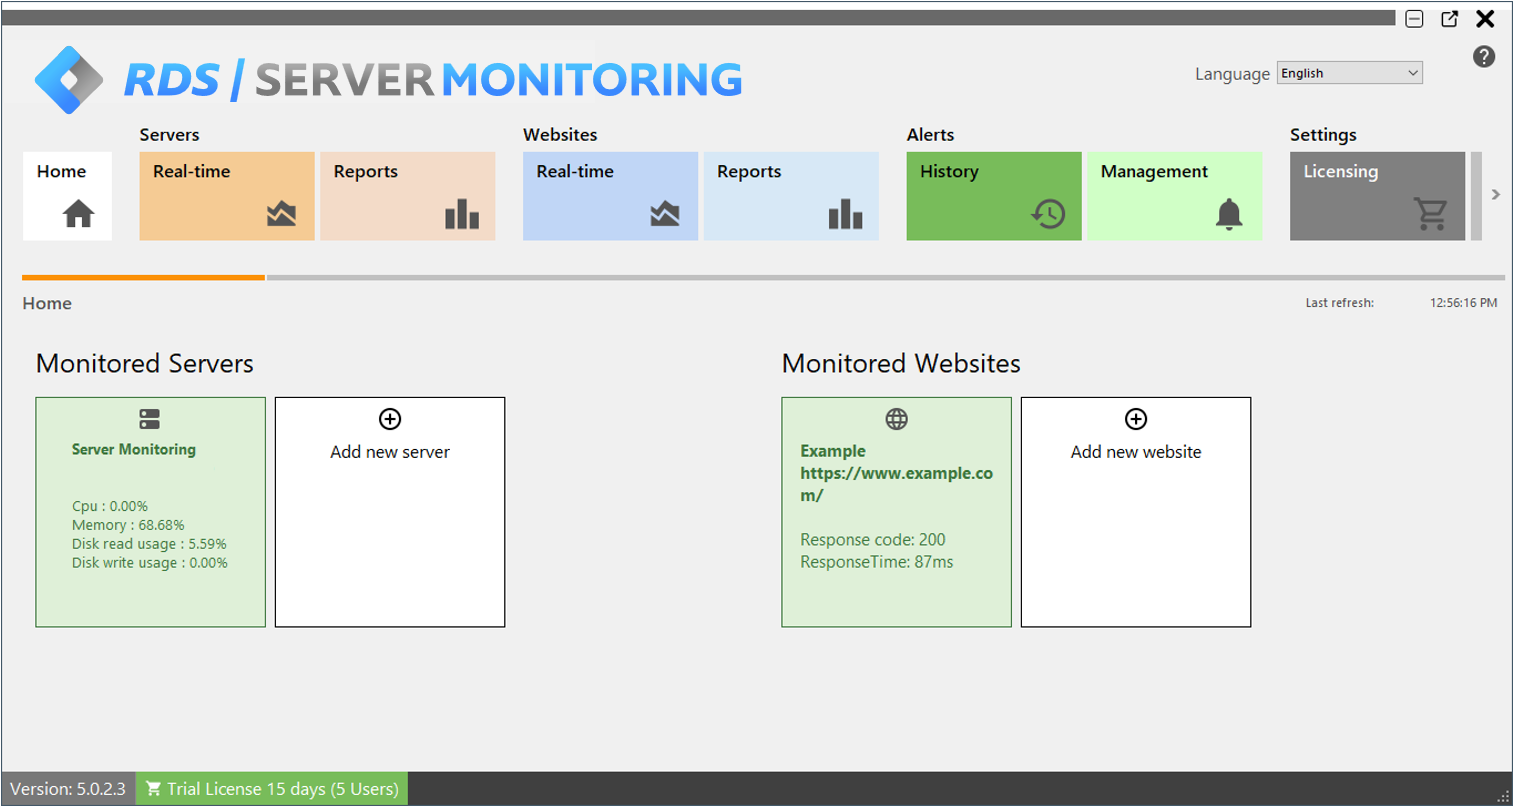
You can see one server configured (the server where you installed Server Monitoring) and one website configured (www.example.com).
Next steps
For more details about Server Monitoring, please read the full online documentation.
Do not hesitate to contact us if you have questions or feedback about Server Monitoring and/or this quick-start guide.